The Components
The Motherboard
The motherboard or mainboard is the heart of any computer build. Be it a desktop, server or NAS (Network Attached Storage) build. This is where all of your main components like CPU, Memory (RAM), graphics, networking and other expansion options are located. They come in various sizes and form factors, and manufacturer a varying amount of features to different price points. The particular mother you choose will typically would depend of the following:
- Intended CPU architecture (e.g. AMD, Intel, ARM, etc...)
- Preferred case
- Required expansion options
- Budget
- Availability
The original board of choice for the project was the EPYC3251D4I-2T from Asrock Rack. This is a Mini-ITX board equipped with the AMD Embedded Epyc 3251 processor, dual 10Gb Ethernet LAN and IPMI/BMC management features. The dual 10Gb ethernet on the board was faster than I really needed and I currently did not have the network infrastructure to take advantage of 10Gb network speeds, but it did give me to option to upgrade from 1Gb to 10Gb networking in the future. The on-board IPMI and BMC management features gave me access to enterprise level remote management of the NAS without actually have to physically present. This means I can power cycle the machine, view hardware health status (temperatures), update BIOS/Firmware and perform many other tasks that can be done remotely. Not a necessity but nice to have none the less. The board did feature a single nVME slot, two SATA ports and additional four SATA ports available via the OcuLink port, but it not enough to connect the planned eight SATA drives. But there was 16x PCI-e slot available to allow me to use a storage controller. Being a server orientated motherboard containing features not found on consumer targeted motherboards, did have a price tag to match. It was considerably more expensive than many high-end desktop motherboards, with the only on-line supplier in Australia listing them at $1,414.00 AUD. It was a price I was willing to pay as I wanted the Embedded EPYC processor but alias the board was not available..
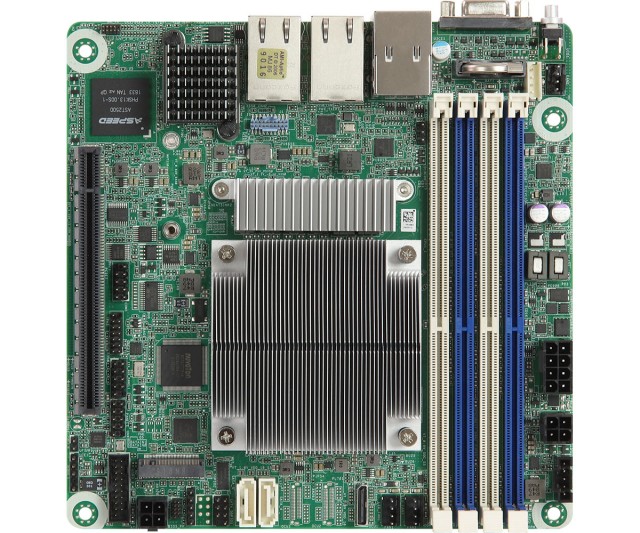
The Asrock Rack EPYC3251D4I-2T
The motherboard I ended up going with was the X570D4I-2T from Asrock Rack. This also a Mini-ITX motherboard sharing many of the features found on the EPYC3251D4I-2T, but features the AMD X570 chipset and the AM4 socket. Since the board did not come with an on-board CPU, did make it considerably cheaper at $779.00 AUD and does give you the option to change the CPU as the need arises. But this meant that a CPU and required cooler had to be sourced separately. The board did have some quirks that the board used SO-DIMM slots for the memory and required the use of Intel LGA115x type cooler instead of the usual AM4 type cooler for the CPU. The motherboard also featured a pre-glued CPU cooler bracket on the bottom of the board which influenced the choice of CPU cooler. Like the EPYC3251D4I-2T, the board did feature a single nNVME slot but the board utilised two OcuLink connectors that where able to provide upto eight SATA ports, though this did require the use of OcuLInk to SATA adapter cables, of which one was provided with the board. As the original board choice necessitated the use of a storage controller and the fact the OcuLink to SATA cables were extremely hard to find in Australia, the original plan of using a storage controller card was retained.
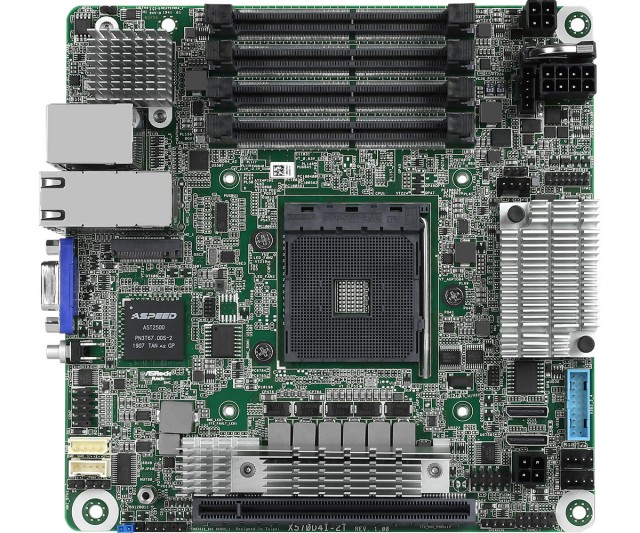
Asrock Rack X570D4I-2T
I did a video going over the board here - Project Clio: Ep2 The Mainboard
The CPU
The CPU architecture you use will ultimately come down to what your personal preference is or even to what you have on hand. If you are building a NAS for just storage purposes, then any low-power or the low-end CPU from Intel or AMD, even embedded CPU options, will suffice for your needs. Wanting to host guest operating systems using virtualisation, then a CPU with the most cores/threads you that you can afford can be beneficial. High clock speeds are only really necessary if you want to do video trans-coding without using GPU acceleration. My original choice of CPU was AMD Embedded Epyc 3251, which is the CPU equipping the Asrock Rack EPYC3251D4I-2T motherboard. This is a low-power 8 core CPU that would enough processing power to do what I wanted at the time. But as this board was out of stock when I was ready to purchase, and at the time of writing was still out of stock, I had change my motherboard selection which also changed the CPU choice at the same time.
The CPU I ended up going with was the AMD Ryzen 5 3600, which came from my desktop machine. I decided to upgrade the CPU in my desktop to the AMD Ryzen 5 5600X and reuse the AMD Ryzen 5 3600 in the NAS project. This CPU is more than powerful enough for the purposes of the NAS, with it's six cores and twelve threads, with more enough head room to enable me to host other services in the future. Plus the CPU was also equiped with virtualisation features that I can use down the track.
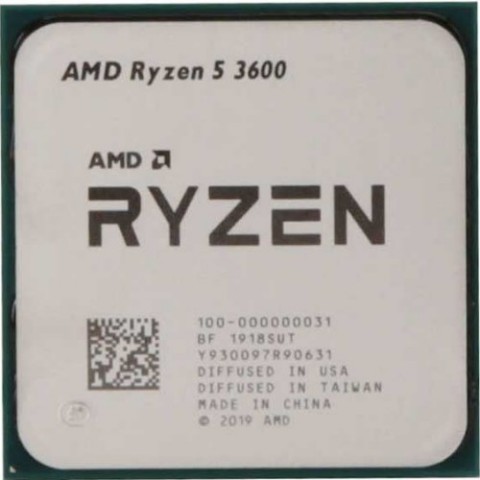
AMD Ryzen 5 3600 AM4 CPU
Due to the motherboard requiring we use a Intel LGA115x type cooler and the fact the case, due to the drive enclosure, had a CPU cooler height limitation of 68mm, meant we could not use the original AM4 CPU cooler that came with the Ryzen 5 3600. Finding a CPU cooler that only had to conform to the 68mm height restriction, but also had to use the existing CPU bracket on the motherboard was easlier said than done. Eventually I settled on the Thermaltake Engine 27 which met the requirements and under most load situations, was able to keep the CPU temps under control.
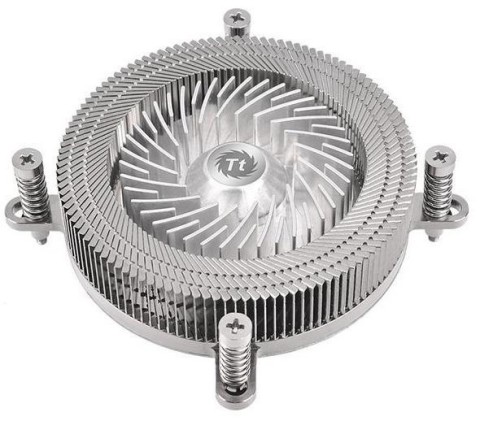
ThermalTake Engine 27 CPU Cooler
This was later swapped out for a SilverStone AR09-115XS CPU Cooler which not only had slightly better performance, I was able to have the CPU cooler airflow follow the direction of the airflow within the case. The fan on the CPU cooler was also upgraded to the Noctua 60mm NF-A6x25 PWM in order to reduce noise.
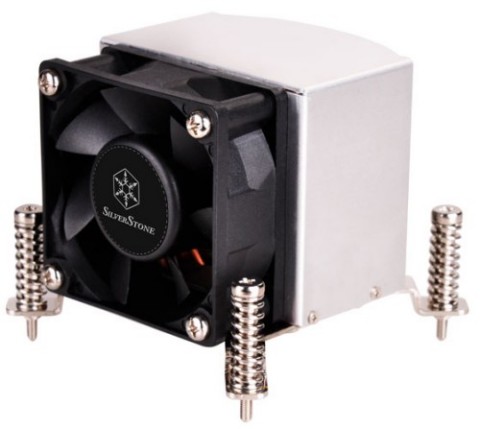
SilverStone AR09-115XS CPU Cooler
Memory
The choice of motherboard and CPU will dictate your choice of memory. The high performance memory target for use gamers tend to exceed the requirements of NAS users and more budget orientated memory module would be beneficial. More budget orientated module than not to have heatsinks, operate at more mid-range speeds and lack any form of LED lighting. But a lower point, can be good value for money as memory capacity name of the game. I would recommend the largest memory capacity modules you can afford but anything more than 8GB of memory would suffice for light duty NAS use.
Using server grade motherboard in combination with CPU's that contained the support, gave me the option to use ECC (Error Correction Code) memory. Now ECC memory has the ability to detect and correct single bit errors and report double bit errors. Bit errors only occur when a bit if flipped either in the memory itelf, during reading of the memory cell or during transfer of data. During the day to day use of PC's, bit errors are rare. But servers which operate 24x7, the chances of a bit error occuring at some point of time is high. Hence the use of ECC Memory. I originally used a pair of Kingston Server Premier KTD-PN429E/16G 16GB DDR4 SODIMM's for a total of 32GB of memory.
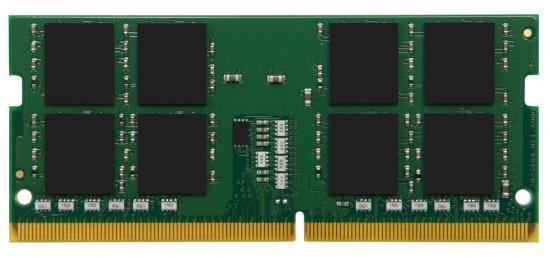
Kingston Server Premier KTD-PN429E/16G 16GB DDR4 SODIMM
Later a pair of Micron MTA18ASF4G72HZ-3G2B2 32GB 3200MHz DDR4 SODIMM's where purchase and eventually combined with the existing Kingston memory modules, giving the NAS 96GB of memory. Way more than I need at the moment.
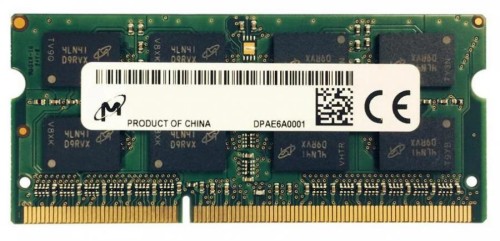
Micron MTA18ASF4G72HZ-3G2B2 32GB (1x32GB) 3200MHz DDR4 SODIMM
Preferred Case
The case will ultimately have to house all the components, from motherboard and power supply to all of your storage devices. Computer cases come in many different sizes and shapes, from enormous full-tower cases to compact ITX cases. Your budget will ultimately guide your purchasing decision as server class cases offer excellent options for storage arrays and have rack-mount options, they can be very expensive. Modern desktop cases tend to have less options when it comes drive mounting options, with the move to motherboard mounted nVME solid state drives for storage. There are still cases available that offer the drive options you require, but it can take a lot of time and searching to find the case that meets your needs.
The computer case I have chosen for the project was the SilverStone CS01-HS in silver finish. This case, though it limits me to motherboards of Mini-ITX size, did give be the ability to house a total of eight 2.5in drives, with six being mounted in a hot-swap drive enclosure and two mounted internally. As this was to be a NAS build, the compact size and hot-swap drive enclosure was endearing features to have. The case used the compact SFX power supply size standard and came with a single 120mm fan mounted on the bottom of the case.
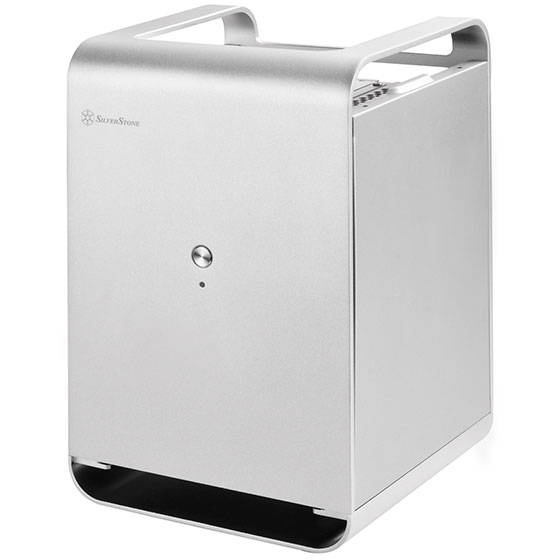
SilverStone CS01S-HS ITX Case - Front View
The case itself was constructed using fairly thick aluminimum plate and used standard stamped steel side covers on the sides of the case, giving the case a solid feel. This case did take me a considerable long time to source, as for some reason or other was exceptionally hard to find a retailer that sells these cases. I managed to find one on Amazon.com for around $220-240 AUD including shipping, which I thought was a good deal. The guys at ServeTheHome website done a nice review on the case, of which you can find here.

SilverStone CS01S-HS ITX Case -Inside View
You can watch a video on the case here - Project Clio: Ep1 Introducing the Case
Storage
As the case had provision for six 2.5in drives in hot-swap drive enclosure as well as additional two 2.5in drives mounted internally, it was decided to use the two internally mounted drives as the boot/operating system drives setup in a ZFS mirror and the six drives in the drive enclosure configured in a ZFS RAID Z2 array providing the main storage pool. The only limitation we had was that we could only use 2.5in drives.
The main issue with 2.5in drives, especially in Australia, is that the most commonly available 2.5in drives in the retail chain are either traditional spinning rust laptop drives or SSD's. Laptop drives are, in my experience, not the most reliable option and do not offer any drive capacity advantage either. Though the hot-swap drive enclosure and the drive controller was SAS (Serial Attached SCSI) compatable, finding reasonably priced drives with sufficient capacity was difficult. This left 2.5in SATA SSD drives as my only viable option. Though they tend to be expensive in regards to their capacity, but they are far more reliable than laptop drives and reasonably cost-effective in performance and capacity when compared to 2.5in SAS drives. The main weakness of SSD drives is that they do have limited amount of writes they can perform. This is typically rated as TBW (Terrabyte Written) in most consumer drives and PBW (Petabytes Written) in some enterprise drives.
The drives I chose was the Crucial MX500 series 2.5in SATA SSD in 500GB and 2TB sizes. I settled on these drive as they do use actual RAM for on drive caching verses flash memory that cheaper SSD's use. This has hugh impact on performance and sometimes manufacturers are not exactly clear on what their drives use for caching. The Crucial MX500 drives did not have the highest TBW rating, but again price and availability driving factors. Kingston KC series of SSD's did have higher TBW rating than the Crucial MX500 drives of the same size for not much of an increase in price, but were unavailable at the time the project was coming together. The Crucial MX500 500GB drives that were to used for the operating system had a 180TBW rating while the 2TB drives to be used for the storage array had rating of 720TBW. For my needs this should suffice. There are dedicated SSD's intended for NAS with far higher TBW and there are Enterprise level drives with ratings of PBW, but they are cost prohibitive.
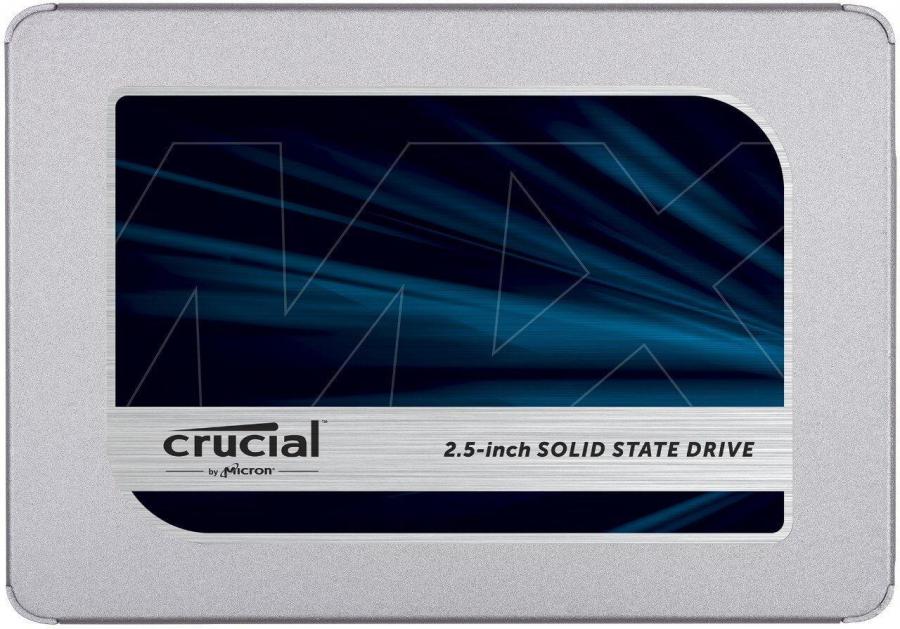
Crucial MX500 2.5in SSD
The storage controller chosen for the project was the SilverStone ESC04 8-port (2x Mini-SAS SFF-8087) SATA/SAS RAID controller. This controller is equiped with LSI SAS 2308 RAID-on-chip (now Broadcom) that provides hardware RAID 0, 1, 1E, 10 modes. This means the card is operating in IR-mode (Integrated RAID) which is not friendly to ZFS. This is because the disks are combined at the hardware level by the controller and presented to the operating system a single logical disk. This means the RAID functions/features are hidden from the operating system and are propietry to the controller. Luckly there is firmware available which puts the card in to IT-mode (Initiator Target), which removes the RAID features and turns the card into what known as a HBA (Host Bus Adapter) controller. This means that any drive connected to the controller is presented directly to the operating system and the file system in use. There is no layer in the middle, just the way ZFS likes it.
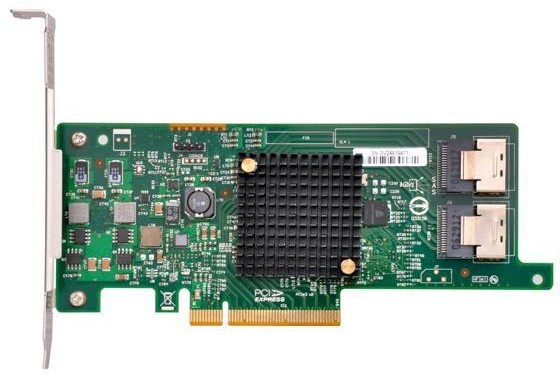
SilverStone ECS04 Storage Controller
Power Supply
The one crucial and often overlooked component any PC build, is the PSU (Power Supply Unit). Without it, nothing would function at all. There are various standard form factors that PSU's adhere to, ATX, SFX and TFX to name a few, with ATX being the most common. Your choice of case will specify which power supply form factor you can use and in my case, I had to use a SFX power supply. These days, PSU's have a rating system call 80 Plus, that rate the power conversion efficiency of the PSU, starting with 80 Plus (White) with a minimum efficiency of 80% all the way up to 80 Plus Titaniunm with a minimum efficiency of 90% (approx 96% peak). I went with the Corsair 600W SF600 SFX power supply, which is 80 PLUS Platinum rated and is fully modular. It does come with a brack to enable it to be used in a ATX case.
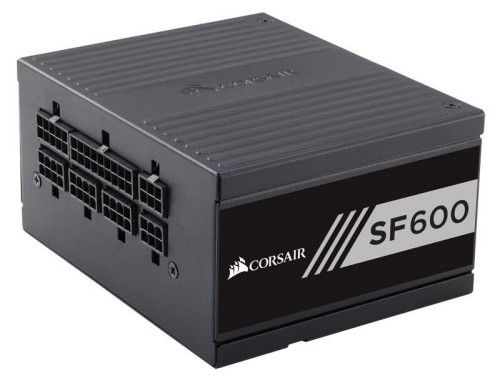
Being fully modular, enable me to only have the powers cables I needed and none that I didn't in the case. Reducing clutter. Also it made it easier for me to modify one of the power cables for the motherboard, removing the need for the adapter provided with the motherboard. You watch my videos on the modification of the cables here and here.
Conclusion
The selection of the hardware for your NAS project can be a challenging journey inself and a very important step in the build process. My journey in building my NAS took years of research and waiting until I had the fund available to initiate the project. So patience is key. Also, you do not need the latest and greatest hardware to build your NAS nor the fastest. Saving money on using lower end hardware like the CPU can free up funds to buy higher capacity or just more drives. Put together a list of hardware and their prices in a spreadsheet and play around with different combinations to see what you can come up with within your budget. This is a very important step of planning your build and planning is something you cannot skip on. As they say in the Army, the Five P's. Proper Planning Prevents Piss-poor Performance.
You can watch the above hardware being put together here - Project Clio: Ep5 The Build